


If you have never seen a prosthetic live demo, it can feel a bit mysterious. What happens in that room? Who is there? What do they check? Will it hurt? Will it be awkward? We hear these questions every day. So we decided to lift the curtain.
At RoboBionics, we run live demos across India for people with limb differences, their families, and clinicians. These sessions are simple, calm, and very human. Our job is to listen first, then show what’s possible. In a demo, you will see how a modern prosthetic hand reads your muscle signals, how it grips, how it feels, and how it fits into daily life. You will learn what to expect, how long things take, and what it costs. Most of all, you will get clear answers in plain words.
This article walks you step by step through the full experience, from the first hello to the final plan. We will share small details that matter in real life—like where to place the electrodes, how to practice safe grips, and how to care for your skin. We will also talk about cost, funding, timelines, and training. Think of this as your friendly guide to a big life decision.
What a Live Demo Really Is
A calm, guided session built around you
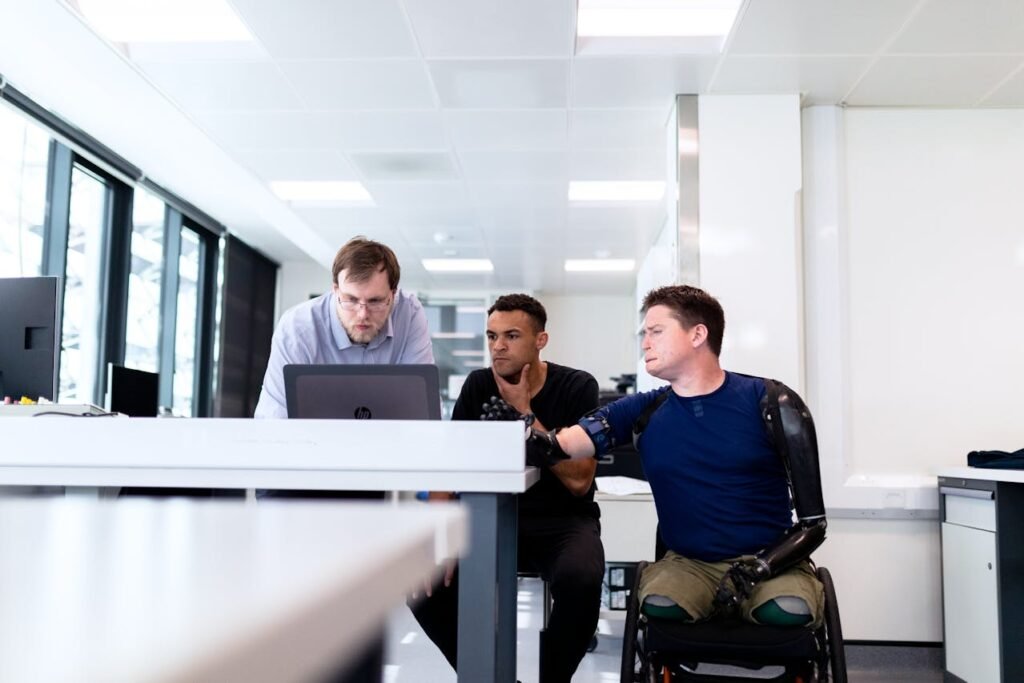
A prosthetic live demo is a focused, hands-on appointment where you try a modern hand in real tasks while our team watches, listens, and guides. It is not a rushed sales pitch or a cold exam. It is a safe space to understand how control feels, how the fit sits on your limb, and how this tool can fit into your day.
The people in the room and their roles
You meet a prosthetist, a clinical trainer, and a care guide. The prosthetist checks your limb, chooses liners, and adjusts the trial socket so pressure is shared, not sharp. The trainer teaches sensor control, safe grips, and simple routines you can repeat at home. The care guide explains price, funding options, timelines, and service, so you leave with numbers and next steps, not guesses.
Your outcomes from the first hour
By the end of a demo, you should feel what “open,” “close,” and “switch” mean for your body. You should know which grips match your daily needs and how our Sense of Touch feedback helps you stop squeezing at the right moment. Most of all, you should have a clear plan for measurement, fittings, training, and support, so your journey feels organized and kind.
Before You Arrive
A short call that sets the plan
We start with a brief call to learn about your work, routine, hobbies, and any skin or comfort issues. If you have used a device earlier, even for a week, we ask what worked and what did not. This helps us prepare the right liners, socket sizes, and grip profiles, so your in-clinic time is personal and useful.
What to bring and how to dress
Wear a short-sleeve top so we can access the forearm easily for sensor placement. Bring your phone, wallet, keys, and any old prosthesis or splint, because real items make practice real. If you have clinic notes or surgery reports, bring them, but it is fine if you do not; we will measure and assess in the room.
Setting expectations on time and comfort
A typical demo takes about an hour, but we move at your pace. Nothing should hurt. If a liner feels tight, an electrode tugs, or the trial socket rubs, we pause, fix, and only continue when you feel settled. Comfort is the bedrock for control, and we treat it that way from the first minute.
Walking In
A gentle start that lowers anxiety
When you arrive, we explain the flow in plain words and confirm your top goal for the day. You might want to hold a cup, unlock a phone, or zip a bag without help. We shape the hour around that goal, because success is easiest when the task matters to you.
Clearing common myths early
We explain that a myoelectric hand does not need surgery and does not deliver shocks. It listens to the natural electrical activity your muscles already produce when you imagine opening or closing the hand. With a few minutes of practice, those signals become steady, and the device begins to feel like a natural tool.
Comfort, posture, and privacy
We check chair height, arm support, temperature, and privacy before we begin. Small changes in posture and calm breathing improve signal quality and reduce false triggers. When your body is relaxed, your control improves, and the whole session feels easier.
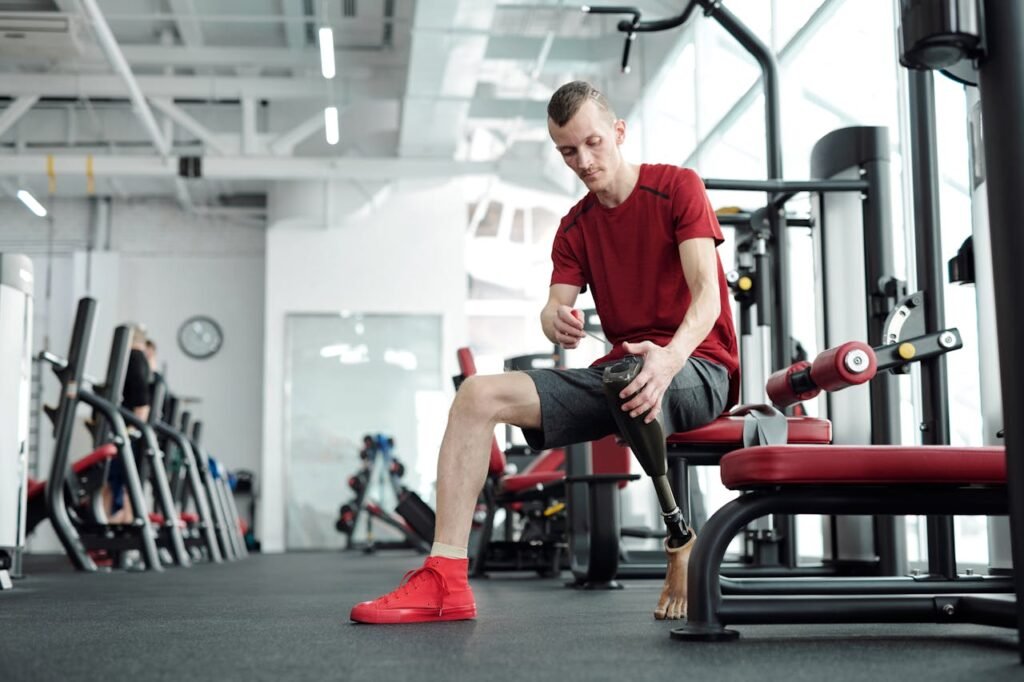
The Physical Check
A respectful look at skin and shape
Our prosthetist examines the residual limb gently, explains each touch, and stops if anything feels tender. We note scar lines, sensitive points, and bony areas that need extra padding. This brief step guides liner choice and trial socket trim lines, which prevents hot spots later.
Trial liner and socket for learning
We try a liner that hugs the limb evenly, then seat a trial socket that holds electrodes in the best spots. This is not your final fit; it is a learning tool for signal testing and posture. We make small changes, ask how it feels, and look for a calm, even contact that you can wear without distraction.
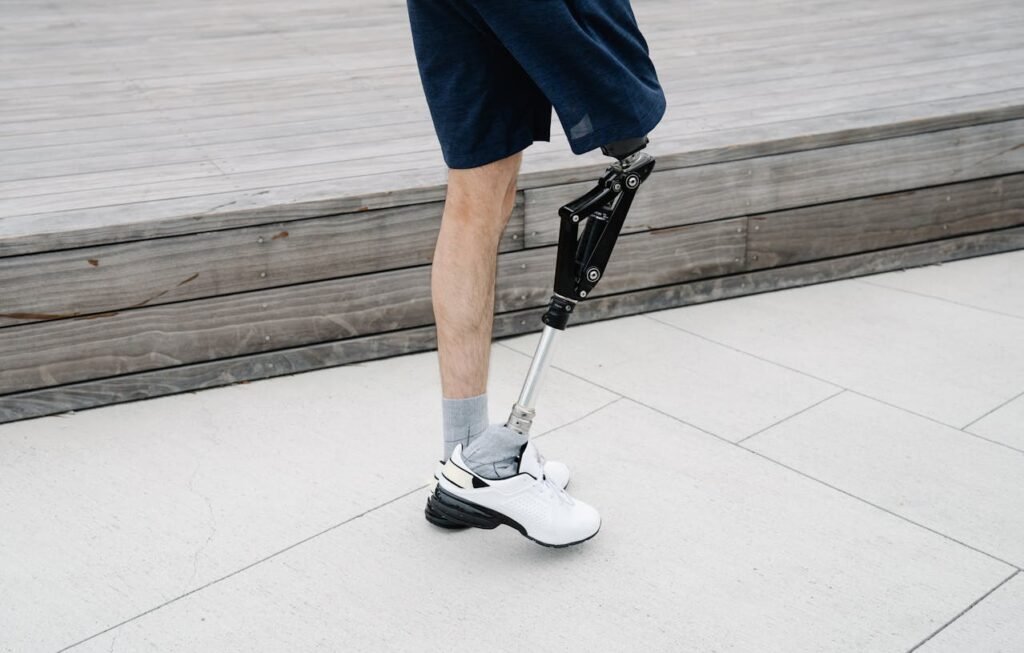
Range and balance checks
We ask you to lift, rotate, and relax the arm while we observe the shoulder and elbow. These simple moves help us set alignment so weight is balanced and cables do not pull. When alignment is right, the device feels lighter, and your neck and back stay happy through a long day.
The Tech, in Plain Words
How myoelectric control works
When you think “close,” certain forearm muscles fire. Small electrodes on the skin sense this and send the signal to the controller, which turns it into motion. You do not need to strain. A steady, moderate effort gives the best control and the least fatigue, which is why we train calm, not force.
Sense of Touch feedback that guides force
Our Sense of Touch feature gives a gentle cue when grip force is enough. You learn to stop squeezing at that cue and hold the object safely. This single detail reduces drops, prevents crushed cups, and saves energy because you are no longer guessing how hard to squeeze.
Battery, weight, and wear
Grippy is light and balanced for daily use. The battery charges like a phone, and we show you how to check levels and swap if needed. With a simple nightly routine—charge, wipe, and dry—you wake up ready for a full day without worry.
Sensor Placement
Finding strong, clean signals
We clean the skin with a mild wipe and place electrodes over the most active muscle points. You make a gentle “close” effort, and we watch live signal bars on our screen. If the pattern looks noisy or weak, we shift by a few millimeters and retest until we see a clean, repeatable rise and fall.
Tuning sensitivity so effort feels natural
We set gain so normal effort produces a strong signal without over-flexing. You should be able to breathe, talk, and control the hand without tension. If sweat or dry skin affects contact, we choose liners and sleeves that keep signals steady across your usual day.
Cable routing that protects comfort
We route cables flat and away from edges so they do not rub when you reach or turn. If a spot touches skin, we add a soft sleeve or change the angle. Then we teach a simple on-off routine so you can seat the socket easily without tugging wires.
Calibration
Teaching the hand your unique pattern
Calibration captures four states: rest, open, close, and a short switch cue. It usually takes less than a minute and creates a stable base for control. If we adjust electrode placement later, we repeat the step so the device continues to listen to you, not to noise.
Rest as a real command
Rest is not “nothing.” It is a clear, relaxed signal that tells the hand to stay still when you talk, walk, or turn. We practice this for a few breaths because a good rest reduces accidental triggers and makes every action cleaner.
Reliability checks that build trust
We repeat cues while you shift in your chair or look around, because small movements can change signals. If drift appears, we tweak placement or sensitivity. When the chart stays steady, we move on to motion, knowing the device will respond to you reliably.
First Movements
Slow open, slow close, steady breathing
We begin with slow open and slow close to help your brain map intention to motion. Most people smile on the first try and then want to repeat it, which is good because repetition builds calm control. Within minutes, the movement stops feeling strange and starts feeling like yours.
Switching grips with a simple rhythm
To change grips, you use a brief, deliberate cue, return to rest, and then act. This rhythm—cue, rest, act—keeps transitions clean and predictable. After a few cycles, you stop thinking about the steps and start focusing on the task in front of you.
Confidence first, speed later
We do not rush. We add speed only after your movements look smooth and relaxed. Smooth control reduces fatigue, protects skin, and prepares you for the more complex tasks you care about most.
Grip Patterns You Will Try
Tripod grip for pens and keys
Tripod grip blends control with a forgiving target. You pick up a pen, align it on a page, and place it down without a wobble. The same pattern works for keys and small tools, so practice here pays off all day.
Power grip for cups and bottles
Power grip teaches safe force with larger objects. We use a filled cup so you can feel the Sense of Touch cue and stop at “just enough.” You lift, take a step, and set it down without a splash, which builds trust fast.
Pinch and lateral for cards and paper
Pinch and lateral grips handle thin items like cards, tickets, and receipts. You slide a card from a flat surface, turn it, and place it into a narrow slot. These small wins make payments, gates, and doors less stressful.
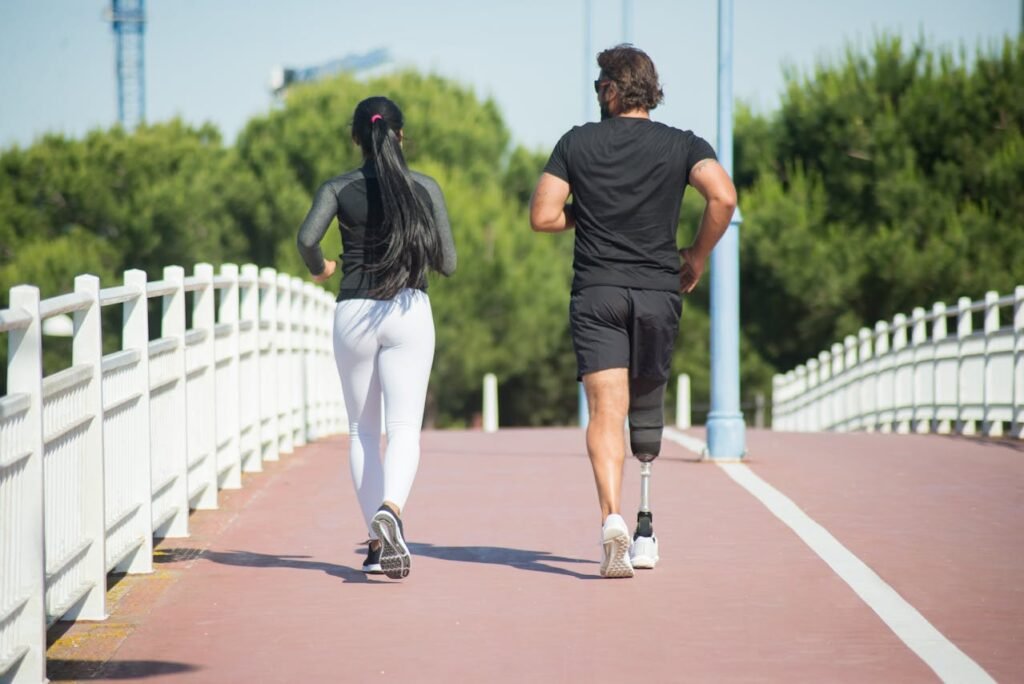
Everyday Tasks You Will Try in the Demo
Eating and kitchen basics

Once you get comfortable with basic grips, we test them in simple meal routines. You scoop food with a spoon, steady a bowl, and lift a cup without spilling. These steps may sound small, but they build confidence because eating is something you do several times a day. We also talk about little adjustments—like using non-slip mats under plates or choosing cups with better grip—that make daily life smoother.
Handling phones, wallets, and keys
Phones and wallets are constant companions, so we make sure you practice with them during the demo. You pick up your phone, unlock it, place it in your pocket, and take it out again while standing. You try sliding a card into a slot or picking coins from a surface. These exercises show how grip control transfers into everyday independence.
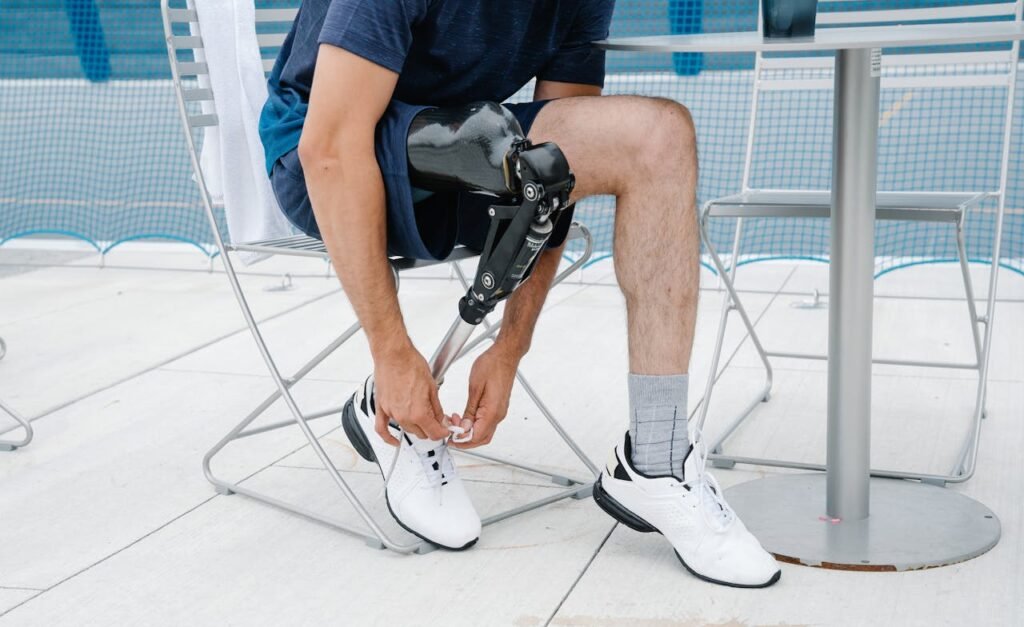
Dressing and personal care
We also practice small dressing tasks like zipping, buttoning, and pulling elastic waistbands. Starting with larger buttons helps you learn the rhythm before moving to smaller ones. We also check how your sleeves interact with the device to avoid snagging. If time allows, we show toothbrushing, combing, or handling grooming tools, since personal care is central to dignity.
Safety and Skin Care
Watching your skin closely
After removing the socket, we check the skin together. A little redness that fades in twenty minutes is normal. Lasting marks, sharp pain, or blisters are not. We show you how to monitor daily and when to reach out for help. Catching problems early means they never become barriers.
Simple hygiene routines
A daily cleaning routine keeps both your skin and the device safe. Wash liners with mild soap and water, let them dry fully, and wipe the socket with a soft cloth. Avoid heat or hairdryers, because they can damage materials. These few minutes every night prevent odor and keep sensors working properly.
Practice schedules that protect your body
In the first weeks, short and frequent practice sessions are far better than long, tiring ones. We encourage you to stop before muscles feel sore, because fatigue often causes messy signals. Clear pauses and breaks help your body adapt without stress.
Comfort and Fit Tweaks
Why adjustments matter
Even small changes in strap length, padding, or trim lines can transform your comfort. If something feels off, we fix it on the spot. We want the device to feel “quiet” on your body, so you can focus on life rather than the socket.
Keeping signals steady all day
Sometimes sweat or long wear causes signals to drift. For this, we offer breathable liners, small angle changes for electrodes, or sleeves that manage moisture. The aim is always the same: stable contact from morning to evening.
Protecting posture and balance
We check alignment to be sure your shoulder and neck are not carrying extra strain. A few posture tips—like dropping a raised shoulder or keeping the elbow slightly relaxed—can save you hours of discomfort later. When balance feels natural, you will wear the device longer without even noticing.
Cost, Funding, and Timelines
Honest pricing without surprises
We explain the cost of the device, socket, fittings, training, and service in one clear breakdown. Warranty terms are explained in plain words so you know what is included. You walk away with real numbers, not estimates or hidden fees.
Funding options made simple
If funding support is needed, we share paths through insurance, CSR programs, and NGO partners. We provide official quotes, clinical notes, and even sample letters to speed the process. A simple checklist makes the paperwork feel manageable instead of overwhelming.
The timeline you can expect
From measurements to delivery, the journey usually takes a few weeks. You will need two to three fittings plus short training sessions. We plan around exams, jobs, weddings, or family events so the process feels supportive rather than disruptive.
Training After the Demo
Your first week
We keep things very simple in the first week. You practice donning and doffing, holding a steady rest, and mastering open–close without rushing. We suggest a tiny journal—just a few notes about comfort and control—so you can track progress and bring questions to your trainer.
Your first month
By the end of the first month, you extend wear time and add small daily tasks like lifting a cup, picking up a phone, or zipping a bag. Training is tailored to your real routine, so what you practice in the clinic makes sense in your home and work life.
Your first three months
Within three months, most people can switch grips quickly and use the hand for a full day. At this stage, we practice harder situations—like handling slippery objects, moving through a busy crowd, or cooking with heat nearby. By now, the hand feels less like a gadget and more like part of you.
The Human Side of a Demo
Support from family and caregivers
We involve family in the demo, teaching them how to encourage without taking over. Small prompts like “rest, then close” help, but real progress comes when you do the action yourself. We also suggest little home changes—like non-slip mats or better storage heights—that make your environment work with you.
Answering common worries
Almost every demo comes with questions like “Will it be too heavy?”, “What if I drop it?”, or “Will learning take forever?” The answers are simple. The hand is designed to be light and balanced, it is durable for normal use, and most people learn within weeks, not years. These reassurances matter as much as the training itself.
Why dignity comes first
We never rush or pressure anyone to decide. A demo is your chance to explore, not commit. The device is here to serve your life, not the other way around. Respect and dignity are the heart of the process.
Conclusion
A prosthetic live demo is not about technology alone. It is about giving you the chance to feel what life could look like with more freedom, more control, and more confidence. From the first handshake to the final plan, the session is designed to answer your questions, calm your fears, and open new possibilities.
At RoboBionics, we believe independence should be affordable, accessible, and deeply human. That is why we build locally, keep costs fair, and support you at every step. If you are curious about what this experience feels like, the best way is to try it yourself.
You can book a demo today at: https://www.robobionics.in/bookdemo/
Take the first step. You may be surprised how natural the journey feels once you begin.