
Post-Op Follow-Up Schedule That Prevents Prosthetic Delays (For Clinicians)
For many clinicians, the surgery is only the first step. What happens after the operation


The first two weeks after an amputation define how the rest of recovery unfolds.
This short yet crucial window—post-op day 0 to 14—is when the groundwork for healing, edema control, and future prosthetic readiness is laid.
For physicians, this period is more than routine wound monitoring.
It’s when the right actions can prevent complications, shape the residual limb properly, and build the confidence that leads to early prosthetic success.
Every decision—how you wrap the limb, how you position the patient, how soon you start gentle exercises—matters more than it may seem in the moment.
Many doctors focus heavily on surgery itself, but long-term mobility is shaped by what happens afterward.
By managing swelling efficiently and preparing the patient’s body and mind for prosthetic initiation, you set the stage for faster rehabilitation and stronger outcomes.
This article serves as a physician’s complete day-by-day guide for the first two weeks after amputation.
It explains how to control edema, protect the surgical site, maintain muscle activity, and prepare the residual limb for the next phase of prosthetic care.
It’s written to be clear, practical, and deeply human—because every good prosthesis begins with good healing.
The first seventy-two hours after amputation are about balance—balancing rest with gentle action, comfort with vigilance, and protection with preparation.
This is when the body begins to react to trauma, and physicians must guide the patient through inflammation, pain, and the initial emotional impact.
The focus should be on creating a stable, calm healing environment.
That means maintaining circulation, controlling pain, and preventing infection before they become obstacles.
At this stage, your involvement sets the tone for everything that follows.
A patient who feels well-cared for and well-informed will trust the process and engage actively in recovery.
Right after surgery, the body’s natural response is to swell.
Blood vessels expand, fluid builds up, and the tissues around the incision feel warm and tender.
While some swelling is healthy, uncontrolled edema can delay healing and distort the limb’s final shape.
You should monitor the limb closely for signs of excessive fluid retention.
Gentle elevation—keeping the limb raised above heart level—helps reduce swelling and supports venous return.
Avoid tight bandages or constrictive clothing during this period, as they can trap fluid and cause pain.
Pain control is essential, not only for comfort but also for healing.
When pain levels are stable, patients breathe better, rest more deeply, and move more confidently.
Uncontrolled pain, on the other hand, can lead to muscle tension and delayed wound recovery.
Use multimodal pain management—combining medication, gentle positioning, and psychological reassurance.
Teach patients relaxation techniques like deep breathing or guided imagery to complement medical therapy.
A calm patient heals faster and develops fewer complications.
The first dressing change is always a crucial moment.
Inspect the incision for drainage, discoloration, or unusual odor.
Any early sign of infection—such as increasing redness, heat, or tenderness—should prompt immediate intervention.
Keep the wound clean and dry, using sterile materials for dressing.
If drainage is heavy, change dressings more frequently and monitor the amount and color of the fluid.
Your careful observation in these early days can prevent setbacks that may take weeks to correct.
Beyond the medical, this is also when emotional care matters most.
Many patients wake up feeling disoriented and fearful.
A gentle, honest explanation from the physician can help them accept the reality of surgery and focus on recovery.
Take time to speak directly with the patient and their family.
Explain that swelling, pain, and limited motion are temporary stages.
By framing recovery as a step-by-step journey, you give them hope and purpose from day one.
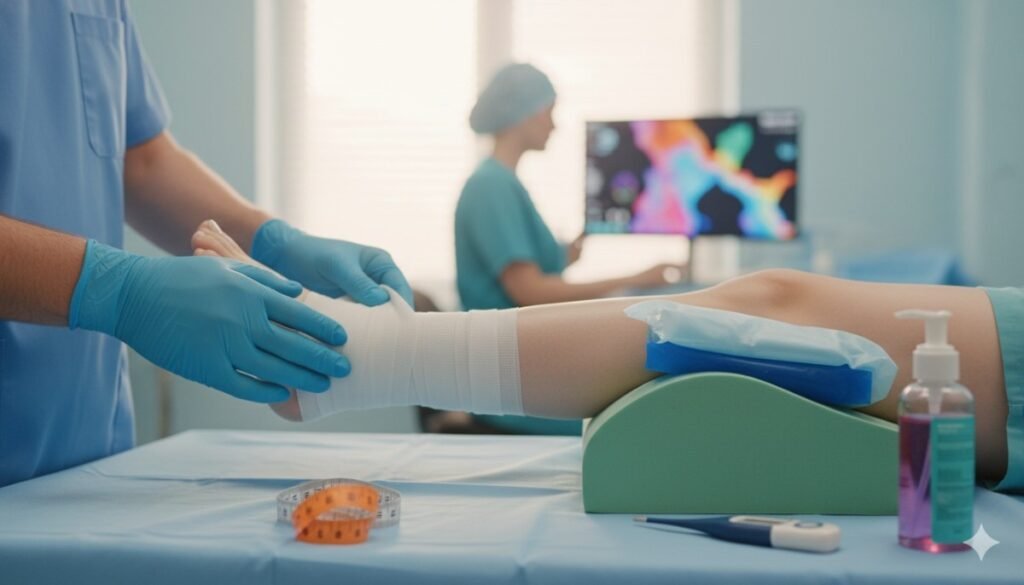
As the initial inflammation begins to settle, it’s time to shift from simple elevation to structured compression.
The goal here is to guide swelling rather than just reduce it.
Compression helps shape the residual limb into a smooth, conical form ideal for future prosthetic fitting.
Start with soft elastic bandages or shrinker socks once the wound is stable.
Teach proper wrapping techniques—uniform pressure from distal to proximal, avoiding folds or tight bands.
Improper wrapping can cause more harm than good by trapping fluid or irritating the incision.
Under compression, regular inspection becomes critical.
Every day, check for color changes, excessive warmth, or blanching.
These may indicate poor circulation or uneven pressure.
Encourage patients to report any tingling or numbness immediately.
The goal is firm but comfortable compression—never restriction.
Healthy pink skin and good capillary refill mean the technique is working well.
By day four, once pain is under control and swelling begins to recede, gentle movement can start.
Passive and active exercises prevent stiffness and promote blood flow.
For below-knee amputees, encourage knee flexion and extension; for above-knee cases, focus on hip control and posture.
These early movements also prepare the patient psychologically for rehabilitation.
They learn that mobility is still possible and that progress continues even before prosthetic fitting.
Around this stage, many patients experience phantom sensations or pain.
They may feel tingling, itching, or pressure in the missing limb.
Reassure them that this is common and typically improves with time and activity.
Encourage gentle tapping or massage around the residual limb, which helps the brain recalibrate sensory input.
Staying active and engaged with therapy also minimizes discomfort and anxiety about these sensations.
This is when teamwork becomes essential.
Share updates with the rehabilitation team about wound status, swelling patterns, and pain control.
Physiotherapists can then tailor exercises safely based on your observations.
Regular interdisciplinary communication ensures that recovery progresses in harmony.
It prevents conflicting advice and keeps the patient’s trust strong.
By the second week, the incision should show clear signs of healing.
The skin edges start closing, tenderness reduces, and drainage should be minimal.
This is the right time to evaluate the wound for readiness to begin more structured compression.
If the healing appears uneven or if there’s persistent swelling near the sutures, review wrapping technique and adjust.
Avoid rushing this phase; slow, consistent progress leads to better long-term outcomes.
As the tissues strengthen, move from light elastic wraps to firmer bandages or specialized stump shrinkers.
Ensure that the compression remains even and the patient can reapply it confidently at home.
Education here is key—patients who understand the purpose of compression stay compliant.
Explain that shaping the limb early reduces discomfort later during prosthetic fitting.
It prevents redundant soft tissue and prepares the skin for socket pressure.
While attention often centers on the operated side, the rest of the body also needs care.
Encourage strengthening exercises for the intact limb, arms, and core.
These muscles will carry additional weight during early mobility training.
Simple routines like bed push-ups, seated lifts, and assisted standing keep the whole body active.
This maintains circulation and prevents deconditioning.
At this stage, many patients experience emotional fatigue.
The initial adrenaline of surgery fades, and frustration can creep in.
Physicians should acknowledge these feelings openly.
A short conversation or words of reassurance from you can make a significant difference.
Remind them how far they’ve come and that every day of effort is shaping their future independence.
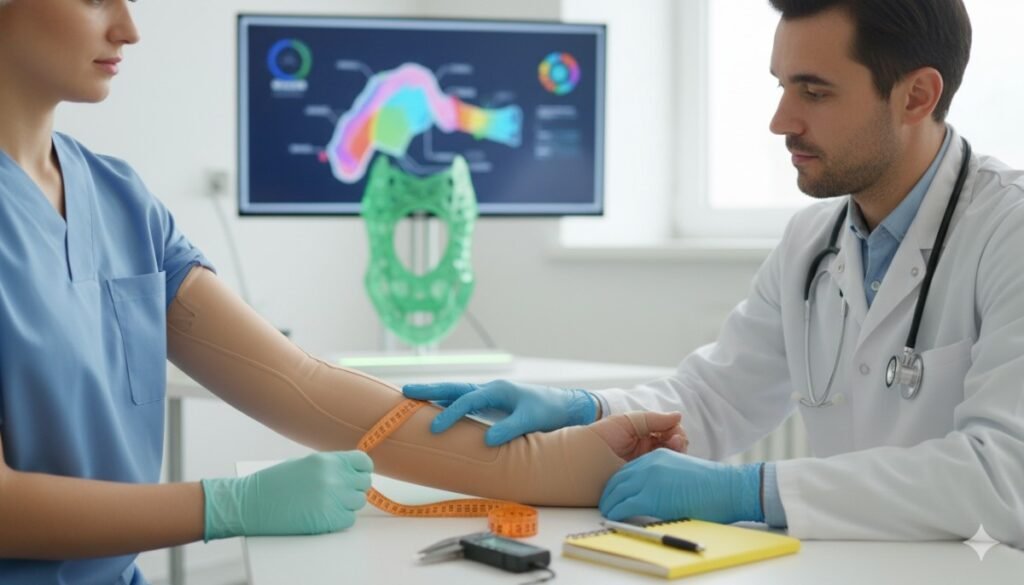
By the end of the second week, the residual limb should look smaller, firmer, and more uniform in shape.
The incision should be well-sealed, with minimal tenderness or discharge.
This is the point when you begin assessing prosthetic readiness.
Press gently around the incision line.
If the tissue holds pressure without pitting and there’s no excessive pain, it’s a good sign that compression is effective.
The skin should feel resilient rather than fragile.
Now is the time to bring the prosthetist into the conversation.
Share your evaluation findings and photos of the healing limb if necessary.
The prosthetist can begin planning preliminary casting or scanning for a training socket.
This early coordination saves valuable time later.
It also gives the patient a clear picture of what to expect next, reducing anxiety.
Encourage patients to practice balance, even without a prosthesis.
Seated and supported standing exercises build proprioception and confidence.
These activities also strengthen stabilizing muscles, making prosthetic training smoother.
Physicians can work closely with physiotherapists to set achievable daily goals.
Consistency in movement keeps the patient motivated and prevents muscle atrophy.
Skin health becomes a top priority as prosthetic work approaches.
Teach patients to clean and moisturize the residual limb daily using mild, non-irritating products.
Dry or fragile skin can lead to breakdown once socket pressure begins.
Avoid oils or heavy creams that soften the skin excessively.
Encourage the use of breathable fabrics to keep the area dry and free from friction.
As discharge or outpatient transition nears, patients often feel uncertain again.
They’ve mastered wound care but now face the unknown of prosthetic use.
Your reassurance during this shift is vital.
Explain the timeline clearly—when they’ll meet the prosthetist, what fittings will involve, and what to expect from therapy.
Clarity reduces fear and builds excitement for the next chapter.
By day fourteen, your role as a physician has moved from healer to guide.
You’ve not only managed swelling and healing—you’ve prepared the patient for independence.

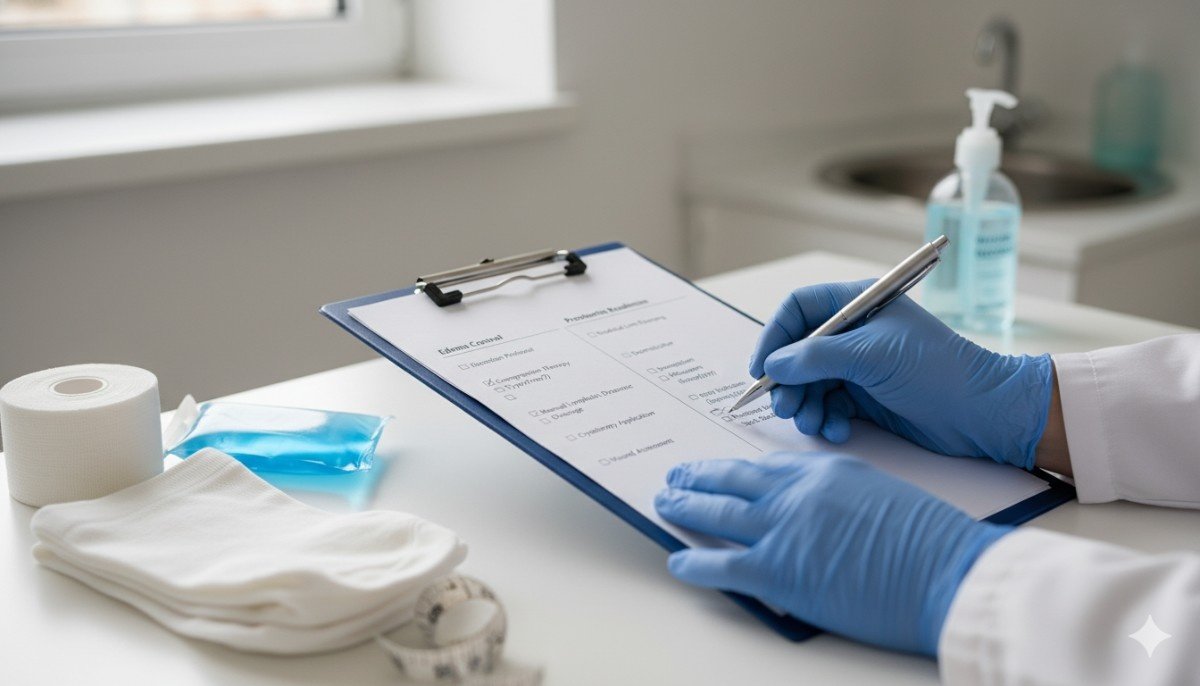
A structured checklist is not just a reminder of tasks—it’s a reflection of discipline and care.
For physicians, it ensures that no detail is missed and that every patient receives consistent, high-quality attention during those crucial two weeks.
The checklist also helps teams work in sync, avoiding confusion or overlap in responsibility.
When used daily, it creates a rhythm for both clinicians and patients.
It reassures the patient that recovery is measured, monitored, and moving forward.
Before any wound or edema management begins, confirm that the patient’s vital signs are stable.
Monitor heart rate, blood pressure, oxygen levels, and temperature regularly.
Fever or tachycardia could indicate infection, while low oxygen saturation may reflect respiratory strain from limited mobility.
Pain scores should be tracked each shift, noting both rest and movement pain.
Stable pain patterns indicate adequate control, while sudden changes often hint at underlying complications.
Small details here can prevent larger issues later.
Examine the incision site under proper lighting.
Look for clean, dry edges and healthy pink tissue around the sutures.
Note any signs of infection such as swelling, odor, or unusual discharge.
Change dressings with sterile technique and document findings clearly.
The type of dressing—whether gauze, hydrocolloid, or transparent film—should match the wound’s current stage.
Encourage the nursing team to photograph the site periodically for progress tracking.
If a patient shows delayed healing, consider consulting a wound specialist early rather than waiting until complications arise.
Use gentle palpation to evaluate the consistency of swelling.
Firm, evenly distributed edema is expected early on; soft, localized pitting edema needs closer watch.
Measure limb circumference at consistent points daily to track trends.
Sudden increases in size may signal infection, hematoma, or incorrect positioning.
Keep the limb elevated above heart level for at least two-thirds of the day.
Avoid prolonged dependency, as gravity quickly worsens swelling.
If the patient struggles with proper positioning, use foam wedges or adjustable hospital beds to assist them.
Pain perception varies from person to person, so structured recording is essential.
Ask the patient to describe the pain’s quality—burning, throbbing, sharp, or dull.
Note changes over time; persistent sharp pain could mean suture tension or ischemia.
Phantom sensations should be logged too, even if mild.
These early experiences often guide future management strategies.
Encouraging patients to talk about them openly reduces anxiety and normalizes the phenomenon.
Color, temperature, and capillary refill time tell powerful stories.
Cool or pale skin indicates vascular compromise, while red or overly warm skin suggests inflammation or infection.
Always check these signs during each round of dressing inspection.
Gently press the skin and observe how quickly color returns.
Normal refill within two seconds means healthy blood flow.
If delay occurs, adjust compression or reposition the limb immediately.
Keep the environment comfortable—cold rooms slow circulation, while hot, humid air promotes sweating and infection.
Improper positioning is one of the most preventable causes of long-term deformity.
Advise patients to avoid prolonged hip or knee flexion for lower-limb amputations.
Encourage lying prone for short intervals if medically safe, to stretch the hip flexors.
Use supportive pillows to maintain alignment without pressure on the incision.
In upper-limb cases, promote neutral shoulder positioning to prevent internal rotation.
Physicians should regularly verify that therapy staff reinforces these same guidelines during sessions.
Unified practice builds strong habits early.
Inactivity can quickly lead to deconditioning and respiratory complications.
Encourage bed mobility, deep breathing exercises, and gentle stretches within the first 48 hours.
These activities prevent pneumonia and help the patient feel active again.
If tolerated, assisted transfers to the edge of the bed or chair should begin around day three or four.
Even brief upright sitting promotes circulation and morale.
The more the patient participates, the smoother the later prosthetic phase will be.
The emotional shock of losing a limb can be quiet but profound.
Patients may appear calm but internally feel fear or grief.
You can make a huge difference by asking simple, compassionate questions.
“How are you feeling about the recovery so far?” often opens an honest dialogue.
If signs of withdrawal or sadness persist, bring in a counselor early.
Emotional health directly influences physical recovery—one cannot thrive without the other.
Every day is an opportunity to educate.
Teach patients and their families how to maintain hygiene, manage bandages, and perform simple limb checks.
Explain what’s normal—mild swelling, tingling, or tightness—and what requires medical attention.
Use plain language.
A short demonstration is often more effective than a long explanation.
When families feel confident, the home environment becomes part of the treatment plan.

By the time the patient is ready for discharge, compression should be a consistent routine.
Uniform wrapping trains the limb to assume a tapered shape that fits sockets better later.
An irregular or bulbous limb will always challenge prosthetic fitting and comfort.
For many patients, elastic bandages remain the most practical option.
However, once the incision is fully closed, commercial shrinker socks provide more uniform pressure.
Physicians should assess tolerance before recommending them.
Explain that consistency matters more than tightness.
Overly aggressive wrapping cuts circulation and delays healing.
Teach gentle, firm wrapping—snug, not strangling.
Edema doesn’t disappear in a straight line—it fluctuates.
Warm weather, diet, or reduced activity can cause temporary increases.
Physicians should help patients understand these variations so they don’t panic.
If swelling worsens suddenly, evaluate systemic factors like protein levels or cardiac function.
Not all swelling is local; sometimes, the body signals a broader imbalance.
Good nutrition accelerates healing.
Protein intake should be emphasized—eggs, pulses, lean meat, or dairy build tissue faster.
Micronutrients like vitamin C, zinc, and iron aid collagen formation and immunity.
Hydration also matters.
Dehydrated tissues retain fluid paradoxically, worsening edema.
Encourage regular water intake and balanced meals even in low appetite phases.
In India, where dietary habits vary widely, tailor recommendations to local foods.
Small adjustments—like adding lentils or citrus fruits—can make a measurable difference.
As compression continues, skin integrity must remain a daily focus.
Moisturize with mild, fragrance-free lotions at night but avoid application right before wrapping.
Keep the limb dry and cool during the day to prevent fungal growth.
Teach patients to check for rashes or blisters each evening.
These small irritations can quickly escalate under continuous compression.
If sensitivity or dryness persists, consider rotating materials or adjusting the compression pattern.
Proactive skin care today prevents painful complications tomorrow.
By day fourteen, most surgical wounds should show clean closure and stable healing.
However, prosthetic readiness depends on more than a healed incision—it’s about tissue maturity and mental preparedness.
Press gently on the limb; if the tissue rebounds quickly without indentation, the edema is under control.
If there’s no tenderness and minimal heat, you can confidently begin discussing prosthetic planning.
Remember that every patient’s pace is unique.
You are not racing a calendar—you are following the body’s timeline.
Introducing the prosthetist early strengthens patient confidence.
Even if actual fitting will happen later, the prosthetist can educate them about socket types, care routines, and training expectations.
This early dialogue removes fear and builds excitement.
Patients start seeing prosthetic use not as a distant hope but as the next step in progress.
Share your clinical notes and wound images with the prosthetist.
That collaboration ensures socket design aligns with healing patterns and expected limb volume changes.
Transitioning from medical care to rehabilitation often stirs anxiety.
Patients worry about pain, rejection, or their ability to adapt.
Address these concerns proactively.
Explain that the prosthesis is not a replacement but a tool to regain movement.
Highlight examples of successful users to inspire optimism.
When patients feel understood and supported, they approach prosthetic training with energy rather than fear.
While day 14 marks readiness evaluation, fitting usually begins between week four and week eight.
This allows the limb to stabilize in size and shape.
During this gap, ongoing compression and physiotherapy maintain momentum.
Physicians should monitor progress every week.
If healing remains consistent, give the green light for initial measurements and casting.
Small progress reports during this period keep patients motivated and engaged.

In every rehabilitation journey, physicians set the tone.
Your words, choices, and confidence influence how patients and staff perceive recovery.
When you emphasize early readiness, the whole team aligns around proactive care.
Encourage early collaboration, documentation, and emotional empathy.
A patient who feels guided by a confident doctor recovers faster than one who feels lost.
Not all team members may fully understand the importance of edema control and early preparation.
Organize brief, regular discussions with nurses and therapists to reinforce best practices.
Consistency among caregivers ensures patients receive uniform messages and support.
Empower your staff to take ownership of small actions—like rechecking bandage tension or reminding patients to elevate their limb.
These micro-interventions make macro differences.
As discharge approaches, seamless transition becomes critical.
Provide patients with a written summary of wound and compression care, medication schedules, and red flags.
List contact numbers for quick consultation if new symptoms arise.
Encourage tele-consult follow-ups during the first post-discharge week.
Remote reassurance reduces anxiety and prevents unnecessary hospital visits.
It also keeps the physician-patient bond strong.
Above all, remember that this journey is not mechanical—it’s deeply personal.
Your empathy, patience, and communication shape the patient’s emotional recovery as much as their physical one.
When you treat swelling and healing as steps toward hope, patients sense it.
They begin to see beyond pain and visualize life after prosthesis.
That mindset accelerates every form of recovery.

The first fourteen days after amputation are not simply a recovery window—they are the blueprint for the patient’s future mobility.
Every choice the physician makes during this time influences how well the residual limb heals, how confidently the patient adapts, and how smoothly prosthetic fitting will go.
By mastering edema control, maintaining clear communication, and supporting emotional health, you help create patients who are not just healed—but ready.
Ready to walk, to move, and to live fully again.
At Robobionics, we see this readiness as the foundation for everything we do.
When doctors and prosthetists work hand in hand from day zero, patients regain their independence faster and with greater confidence.
To learn how advanced, affordable prosthetic technology like the Grippy™ Bionic Hand can enhance your patients’ journey from post-op to full recovery, visit robobionics.in/bookdemo.
Together, we can turn healing into motion—and motion into freedom.
For many clinicians, the surgery is only the first step. What happens after the operation

For trauma amputees, the journey does not begin at the prosthetic clinic. It begins much

Amputation after cancer is not just a surgical event. It is the end of one

When a child loses a limb, the challenge is never only physical. A child’s body