
Post-Op Follow-Up Schedule That Prevents Prosthetic Delays (For Clinicians)
For many clinicians, the surgery is only the first step. What happens after the operation


After an amputation, recovery isn’t just about healing the wound. It’s about waking up muscles that haven’t been used in a while, calming nerves that feel confused, and helping the body adjust to something completely new. This is where EMS—or Electronic Muscle Stimulation—can play a big role.
But here’s the tricky part: EMS isn’t a one-size-fits-all solution. Especially for people with limb loss, the frequency, intensity, and duration of the stimulation must be just right. Too strong, and it can cause pain. Too soft, and it won’t help. Too fast, and it could tire the muscle. Too slow, and the benefit may be too little.
At Robobionics, we’ve worked with hundreds of users, therapists, and prosthetic experts to understand what actually works. In this article, we’re going to walk you through exactly how EMS frequency and settings can be adjusted for amputees to get the best results—safely and effectively.
We’ll explain what each setting means, how to choose the right combination, and what changes to expect as your recovery moves forward.
Let’s start by understanding the basics.
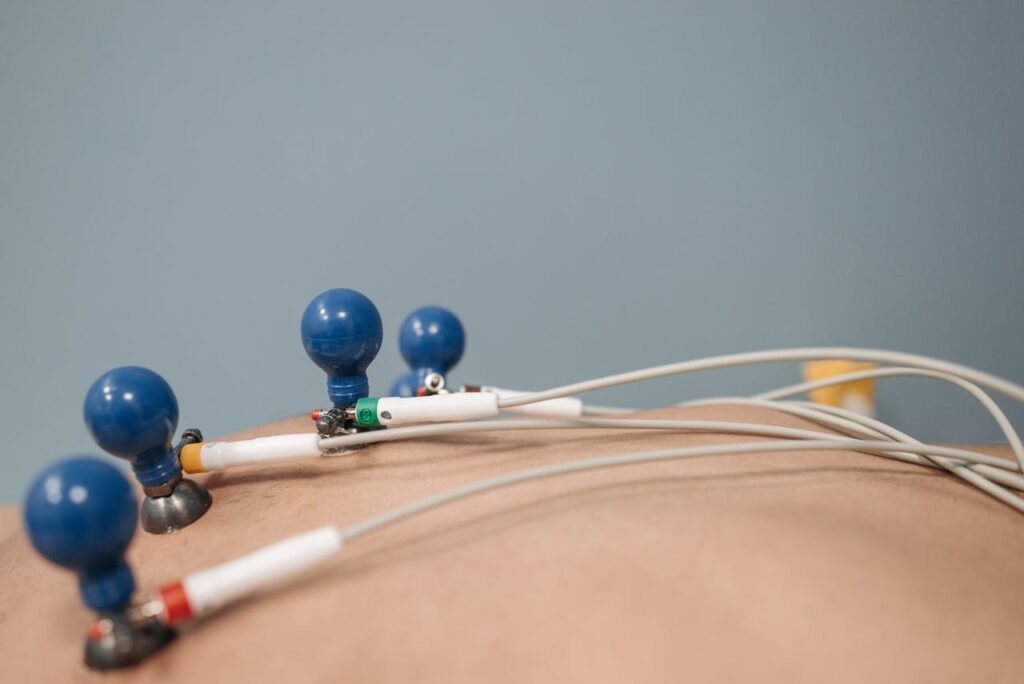
When you look at an EMS device, the screen might show numbers, modes, and wave shapes that seem confusing. But once you understand what each setting does, it becomes much easier to use.
The main settings to focus on are frequency, pulse width, intensity, and duration. Each one plays a different role in how the device works on your muscles.
Getting these settings right means you can activate the muscles gently, safely, and effectively—even if your limb is sensitive or still healing.
For someone with a full limb, EMS is often used to strengthen muscles or recover from injury. But for an amputee, the situation is very different.
The muscles in the residual limb may not have been used much after surgery. The nerves might be hyperactive or overly sensitive. The skin could be thin or healing from scars.
This means standard settings that work for others might feel painful or overwhelming for an amputee.
That’s why careful adjustment is key. A setting that’s too high can lead to sharp pain or twitching. A setting that’s too low may do nothing at all.
The goal is to find the sweet spot where the muscles are active, the nerves feel calm, and the skin stays comfortable.
When EMS is applied, the electrical signal skips the brain and directly tells your muscle to move.
It sends a pulse that makes the muscle contract—just like when your brain sends a message through your nerves. These small contractions keep the muscle strong, improve blood flow, and prepare the limb for using a prosthetic.
For amputees, this process also helps retrain the brain. Your mind begins to feel and recognize those movements again, making prosthetic control easier later on.
But to make this work smoothly, the settings must be tailored to your body’s unique condition.
This range is best for gentle muscle activation and improving sensation. It’s especially helpful in the early stages of recovery.
Low-frequency EMS doesn’t make the muscles contract hard. Instead, it stimulates the nerves just enough to bring awareness to the area.
It can also help reduce phantom limb pain by distracting the brain with a new signal—one that feels steady and safe.
If a patient is new to EMS or has a very sensitive stump, starting with low frequency is usually the safest choice.
Once the skin is healed and the patient feels comfortable, the frequency can be increased to the medium range.
This is where real muscle work begins.
At this level, EMS causes the muscles to contract more strongly, but still gently enough for daily use. It helps prevent muscle atrophy and improves the connection between the brain and the limb.
This frequency range is ideal for preparing a user to wear and control a myoelectric prosthetic.
With regular sessions, the muscles become more responsive, the stump becomes firmer, and the limb is better prepared for prosthetic training.
This is the zone used when the user is already confident and wants to build more strength or endurance.
At this setting, EMS causes strong, frequent contractions that feel like a real workout. It’s often used in physical therapy for athletes—but can be adapted for amputees during advanced stages of recovery.
Not all amputees will need high-frequency EMS, especially those with delicate or thin tissue. But in cases where the goal is strong prosthetic control or active daily use, this level can be helpful when guided by a therapist.
Care must be taken, however, as prolonged use at high frequencies can lead to fatigue or discomfort if overused.
Pulse width refers to how long each electrical pulse lasts. It’s usually measured in microseconds (µs). Think of it like the length of each tap your muscle receives.
A shorter pulse width (around 100–200 µs) sends a lighter, more surface-level signal. It mainly stimulates sensory nerves. This is helpful for early therapy when the stump is very sensitive.
A longer pulse width (around 200–400 µs) goes deeper. It activates motor nerves, which control actual muscle contraction. This is better for strengthening sessions later in recovery.
For amputees, it’s usually safest to begin with a shorter pulse width. As comfort improves, you can gradually increase it under supervision.
The important thing is to avoid jumping to deeper settings before the body is ready. Going too deep too soon can overstimulate sensitive nerves or create unwanted pain.
Intensity is how strong each pulse feels. On most EMS devices, you’ll see it as a number or a bar—something you can turn up or down.
The right intensity depends on the goal.
For sensation training or calming nerves, very low intensity is enough. The goal is not to move the muscle, but to make the brain feel the area again.
For muscle activation, increase it until you see a gentle, visible contraction. This should not feel sharp. You should see the muscle slowly tighten, hold, and then relax.
As a rule, the muscle should never jerk or twitch rapidly. That’s a sign the intensity is too high.
Let the patient lead. Ask them how it feels. Use their feedback as a guide. The best results come when the session feels odd—but not painful.
Another big question is how long each EMS session should last.
For amputees, especially in the early weeks, short sessions are safer and more effective. Start with 10 to 15 minutes once per day. If there’s no soreness or irritation afterward, you can gradually increase to 20 or 30 minutes.
The muscle needs time to adapt. Going for long sessions early on won’t speed things up. It may cause skin discomfort or overstimulation.
After 3–4 weeks of steady progress, some users can safely do two sessions a day, especially if preparing for a prosthetic fitting.
But every increase in duration should come with close monitoring. Watch the skin, listen to feedback, and track how the muscle responds the next day.
Always prioritize steady growth over fast results.

This phase begins once the skin has closed and the surgical site is fully healed.
The stump is likely still swollen, sore, or sensitive. Some users may be experiencing phantom pain or nerve twitching.
In this stage, EMS should focus on calming and reconnecting.
Ideal settings:
The goal here is not movement. It’s awareness, circulation, and comfort. Think of it as soft reintroduction.
By now, the swelling has gone down. The patient may have started basic stump exercises. The limb feels less tender, and sensation is more balanced.
EMS can now be used to gently contract the muscle and begin strength work.
Ideal settings:
These sessions help prevent atrophy and prepare the limb for myoelectric use.
This is also the best time to begin pairing EMS with muscle control training, like mimicking grasp or release motions during the pulse.
At this point, the user is ready to fit or already using a prosthetic. The focus shifts to improving signal strength, endurance, and control.
EMS is now a performance enhancer—not just a recovery tool.
Ideal settings:
These sessions are often used before or after prosthetic practice to either wake up the muscles or help them recover.
By using EMS this way, the prosthetic fits better, responds faster, and feels more natural.
Even with the correct setup, some users may experience discomfort when using EMS. This doesn’t always mean something is wrong—it may just mean something needs adjusting.
The most common cause of pain during EMS is high intensity on a sensitive nerve. This is especially common near scar tissue, around bony areas, or on very thin skin.
Another reason is poor electrode placement. If the pads are too close to each other or placed over uneven skin, the current can feel sharp or pinching.
Dry skin, old pads, or poor contact between the pad and the skin can also lead to irritation. Always ensure the skin is clean and the electrodes stick well.
These small adjustments often make a big difference. Don’t ignore signs of discomfort—listen to them and make changes early.
Some users—especially those with thicker muscle or less sensitivity—might say EMS “isn’t working” or feels too light.
Before increasing intensity, check other settings first.
Try increasing pulse width slightly to reach deeper nerves. Check electrode placement—moving them just 1–2 cm can improve effectiveness. You can also try slightly increasing frequency within a safe range to get a stronger contraction.
If none of that helps, then you may increase the intensity—but only in small steps.
Make sure the user still feels comfortable, and that the muscle contracts slowly—not with sudden jolts.
Skin irritation is one of the most common side effects of long-term EMS use. Redness, itching, or dry patches can appear if the skin is exposed to repeated stimulation or if old electrodes are reused too many times.
To manage this, rotate electrode positions daily. Give the skin time to breathe between sessions. Use non-scented, mild moisturizers on the stump (but not right before EMS). This keeps the skin soft without affecting pad adhesion.
Also, always clean the area with warm water and dry it gently before each use.
If the irritation gets worse, pause EMS for a few days and check with your therapist before starting again.
No EMS session should happen in isolation. Especially for amputees, EMS works best when it’s part of a larger plan that includes physiotherapy, prosthetic training, and regular check-ins.
Your therapist plays a key role in helping you understand which settings are right for your body at different times.
They can show you how to adjust frequency, pulse width, and intensity safely. They can also watch how your muscles respond—and suggest new placements or techniques if needed.
With their help, you avoid setbacks and get the most out of every EMS session.
It’s easy to forget how far you’ve come unless you track your results.
We recommend keeping a simple EMS log. Write down the settings you used, the time of day, how your limb felt before and after, and any changes in sensation, strength, or comfort.
Over time, this log becomes a roadmap. You and your therapist can look back, spot patterns, and adjust your routine based on real feedback—not guesswork.
This also helps when transitioning to a prosthetic. You’ll know which settings gave you the best signal, and how your body reacted to each phase of stimulation.
Your EMS routine today may not be right for you next month. As your muscles grow stronger and your stump becomes less sensitive, your EMS settings should also evolve.
Many users plateau if they keep the same routine for too long. The goal is to slowly challenge your muscles—without overwhelming them.
This is where regular re-assessment is vital. Every few weeks, revisit your EMS plan with your therapist. Ask questions. Explore new goals.
Are you using EMS just to maintain tone—or to strengthen before getting a new prosthetic?
Are you trying to reduce phantom limb pain—or build better signal quality?
Each goal requires a slightly different approach. Stay curious, stay involved, and let your EMS journey grow with your needs.
Do not use EMS on your stump until your doctor says the skin is fully healed. Starting too soon can reopen wounds, damage nerves, or lead to infections.
Even if it feels okay, always wait for the green light.
If you have signs of skin infection—redness, pus, swelling, or warmth—pause EMS until the area is fully treated.
Stimulating infected tissue can worsen symptoms and slow healing.
EMS can help reduce phantom limb pain over time. But if you’re in the middle of a sharp pain episode, stimulation might make it worse.
Wait until the pain subsides, then use EMS at a low frequency to help reset your nerve signals.
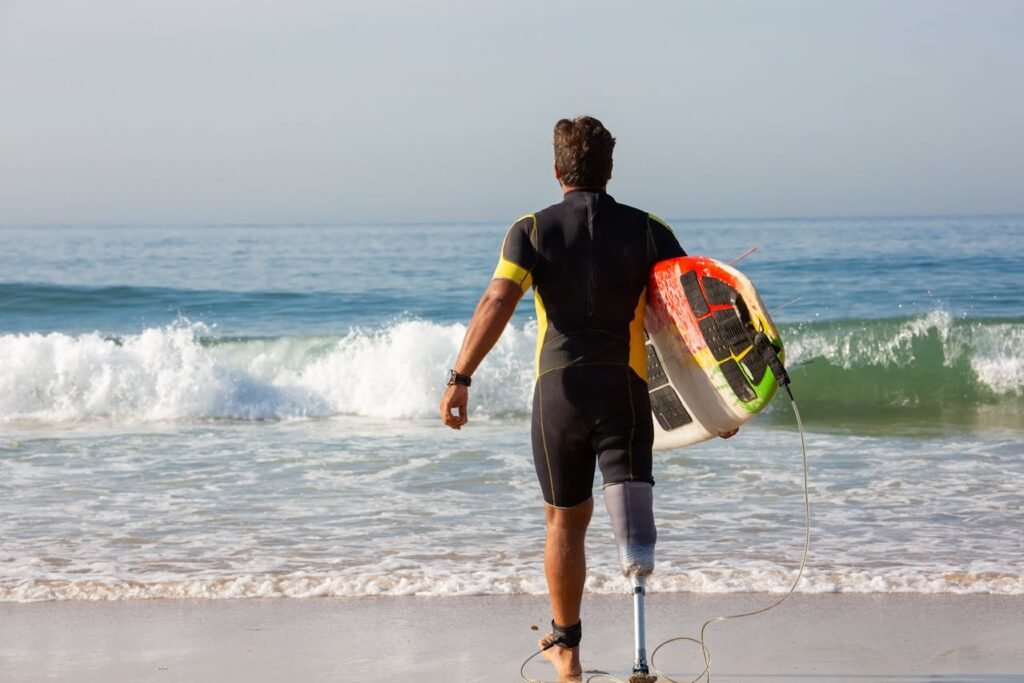
Once an amputee has adapted to their prosthetic and feels comfortable using it every day, many assume the job is done. But the truth is, muscle care never really stops.
Even years after surgery, your residual limb can change. Muscles can lose tone. Nerves can shift. Skin can become dry or irritated. That’s why EMS isn’t just for the early stages of recovery—it’s a helpful tool for the long haul.
Using EMS even twice a week can help maintain signal strength for prosthetic control, ease occasional tightness, and prevent muscle shrinkage. Think of it as maintenance for your limb—just like stretching or light exercise.
It’s quiet, easy, and adaptable to your changing needs. And because it’s non-invasive, EMS can be part of your routine for years without risk when used correctly.
One of the biggest concerns for long-term users is whether EMS is still safe after months—or even years—of use.
The answer is yes, if you follow a few simple habits:
Keep the skin clean. Rotate electrode placement. Use fresh pads. Check your settings from time to time. And most importantly, pause when something doesn’t feel right.
You don’t need to change everything every week. Just stay aware. Listen to your body. Talk to your prosthetist or therapist if something feels off.
This kind of proactive care keeps your stump strong, your prosthetic easy to use, and your body feeling in balance.
Beyond the technical benefits, EMS can be a huge emotional support. For many amputees, recovery is not just physical—it’s about rebuilding identity, self-trust, and confidence in your own body.
Every time you see your muscles respond, every time the signal improves, every time your hand or foot moves the way you want—it reminds you that your body is still capable.
That power, that connection, is what EMS gives back. It’s not just electricity. It’s feedback. It’s reassurance. It’s your brain and body learning to work as a team again.
And in a world where many recovery tools feel cold or complicated, EMS offers something rare: progress that feels personal.
There is no perfect EMS setting for every amputee. Your limb, your nerves, your recovery story—they’re all unique. What works for one person might not work for another.
But by understanding what each EMS setting does, and how to adjust them with care, you give yourself the best chance at safe, effective, and empowering results.
Start low. Be patient. Track your progress. Let your therapist be your guide. And most importantly—stay consistent.
With the right EMS routine, you’re not just waking up muscles. You’re building strength, clarity, and control that will serve you for life.
If you’re just getting started, or if you’re ready to take your recovery to the next level, we’re here to help.
Book your free EMS demo with us today at robobionics.in/bookdemo and learn how to find the settings that feel just right—for your body, your pace, and your goals.
At Robobionics, we don’t just build bionic hands. We help people rebuild their lives—with strength, science, and care.
For many clinicians, the surgery is only the first step. What happens after the operation

For trauma amputees, the journey does not begin at the prosthetic clinic. It begins much

Amputation after cancer is not just a surgical event. It is the end of one

When a child loses a limb, the challenge is never only physical. A child’s body